Follow the steps below to configure HylaFAX Enterprise with your T38Fax.com credentials:
1. Connect to the Appliance Console -- the menu area you see on screen when you boot the HylaFAX Enterprise Appliance server (not the web interface).
If you don't have physical access to the server's console, you can attach to the Appliance Console by running `attach-console` from a remote SSH connection. Simply press CTRL-\ to disconnect from the console when you're done.
2. Select "Advanced Options" -> "Configure Telco Connections"
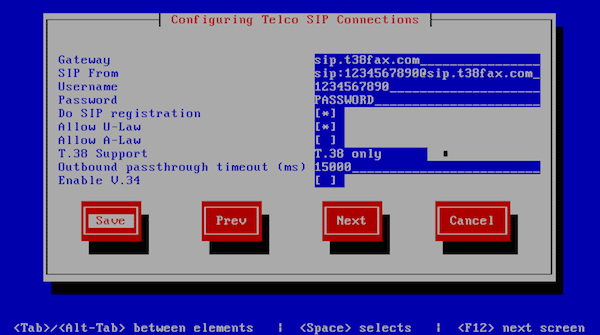
3. Enter your T38Fax.com settings into the following fields:
Gateway: sip.t38fax.com
SIP From: sip:1234567890@sip.t38fax.com
Username: 1234567890
Password: PASSWORD
Do SIP registration: Enabled
Allow U-Law: Enabled
T.38 Support: T.38 only
Outbound passthrough timeout (ms): 15000
* Substitute 1234567890 with your T38Fax.com DID. Substitute PASSWORD with your T38Fax.com SIP password.
4. Save your settings.
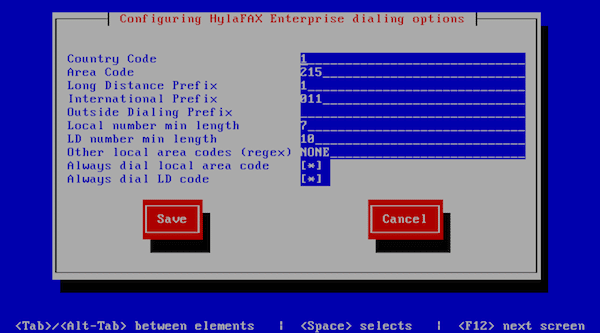
5. Select "Configure Dialing Options" and input the following settings:
Country Code: 1
Area Code: <your local area code>
Long Distance Prefix: 1
International Prefix: 011
Outside Dialing Prefix: <leave blank>
Local number min length: 7
LD number min length: 10
Other local area codes (regex): NONE
Always dial local area code: Enabled
Always dial LD code: Enabled
Save your settings and try to send a fax.